Hi readers! It’s the Monday night of a three-day weekend and I have to say I’m feeling refreshed and rejuvenated after a good weekend of fun, friends, quality time with my man, and of course plenty of knitting.
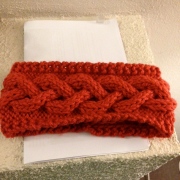
A new cable, a new copper beauty
I finished this new headband design for the shop in a beautiful copper shade, and wore one of my other headbands out on Saturday night for a bit of casual promotion while catching up with mates. Since it picked up a hint of “pub” smell, I had a great excuse to test the yarn for machine wash-ability. It came out of the machine completely intact and even softer than it went in!
I also played around with some ideas for an upcoming craft blogging event in which I have been kindly invited to participate (won’t give too much away just yet).
Today after a good gym session I spent most of the day just adding potential patterns to my Ravelry queue. I must have been living under a rock because I haven’t really gotten into the site until the last month or so. The long weekend gave me the time to actually browse through patterns properly. Any knitters not already on the site should join immediately. It’s such a great source for patterns, advice, ideas, yarn reviews and to see what other knitters are up to.
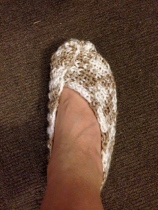
I was keen to try something a bit more fun this evening, so I landed on the Kimono Slippers. This was a great, simple little project that I could tell would be super quick and give me a great chance to dip into some stash yarn. I ended up using Panda Tempo 100% acrylic (I’m not exactly a fiber snob, and this yarn happens to be very pretty and soft) which I bought on sale for $3/skein some time ago.
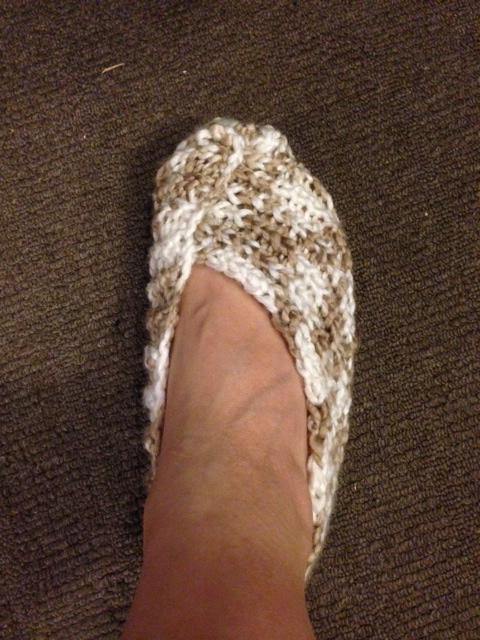
Kimono Slipper prior to stitching up
As you can see, these slippers are worked flat, which is great for a quick project. I didn’t bother with gauge or even using the recommended needle size. I just went for it and made sure to sew it up well.
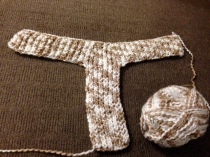
One down, one to go
I finished one slipper tonight while Matt kindly cooked up our steak dinner. I was in the knitting zone. After dinner I sewed up the edges according to the instructions. I think this one is actually meant to be the left slipper, but it feels more comfortable on my right foot, so I’ve just gone with that. I was ready for a break, so I resolved to make its partner later in the week.
However after leaving it be for about 10 minutes, I decided it just wasn’t right. It needed a bit of an embellishment before I’d really be satisfied with it. And so…
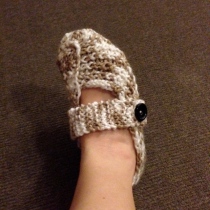
Garter stitch strap with button hole to the rescue!
I thought it would make a nice touch to knit up a quick garter stitch strap and add a button to make it a bit more exciting. Matt agrees that it looks heaps better, and I’m pretty happy with it too. The strap is also functional, as it’ll keep my foot from slipping out. It’s great to take the framework of an existing pattern and spruce it up using your own knowledge. This is definitely one of my favorite things about crafting.
I made the smallest size as my feet aren’t all that big, but I could maybe have gone medium. In any event this slipper is easy to “try on” while you’re stitching it up to ensure it will fit. I still have plenty of yarn on the skein as well, so hopefully I can get a second slipper out of it without having to break into another.
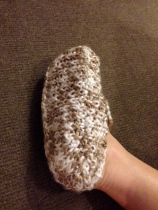
Booty from below
These acrylic slippers are great for the Australian climate, since they protect my bare feet from the chilly floors, but also won’t make me overheat in the warmer months. If you want something really cozy, I’d go for wool.
For the strap, I cast on 6 stitches, working a garter stitch pattern (knitting every row) and creating a button hole three stitches wide a few rows before the end (there are heaps of great buttonhole tutorials out there, it can be tricky the first few times). My advice for this whole project (including the strap) is to slip the first stitch of every row (knitwise or purlwise appropriately) to keep the edges nice and clean.
I encourage everyone to take chances in your crafting. You never know what sort of touch ups might just add a little personal flair to your project. Plus it’s great to use extra supplies that are just lying around your craft space. I have a whole bag of buttons just waiting for opportunities like this.